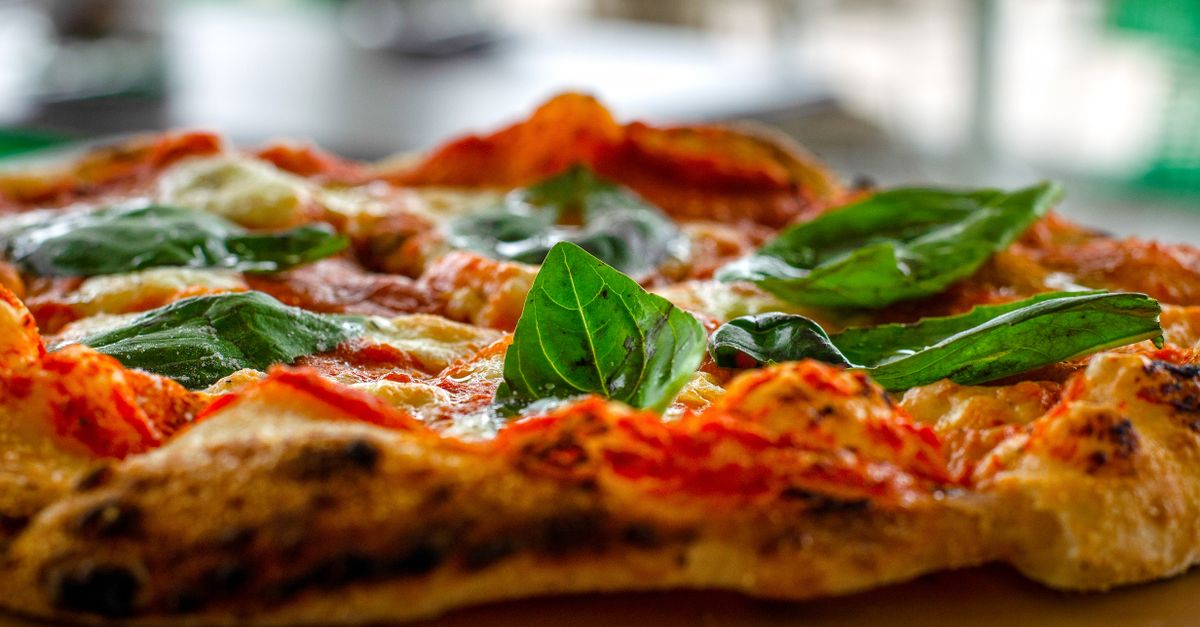
Why Your Homemade Pizza Crust Lacks That Perfect Crisp (And The Simple Pro-Secrets That Deliver Pizzeria-Quality Crunch Every Time)
Are you tired of lovingly crafting a homemade pizza, only to pull it from the oven with a disappointing, chewy, or even soggy crust? I’ve been there. For years, my attempts at achieving that coveted pizzeria-level crispness at home ended in frustration. I’d follow recipes to the letter, use good ingredients, and yet, the bottom of my pizza was always more soft than snap.
It’s a common lament among home bakers, and for a long time, I blamed my oven, or my lack of a fancy wood-fired setup. But what changed everything for me wasn’t a new piece of expensive equipment; it was understanding the fundamental principles of heat transfer, moisture management, and dough science that most home cooks overlook. The mistake I see most often is treating pizza like just another baked good. It’s not. It demands a specific environment and approach to truly shine. Once you understand these pro-secrets, your homemade pizza nights will be transformed from ‘almost good’ to ‘absolutely incredible,’ delivering that satisfying crunch with every bite.
Key Takeaways
- Achieve genuine crispness by prioritizing intense, direct heat from the start, not just high oven temperature.
- Control dough moisture from the mixing stage to prevent steam from creating a soft, chewy crust.
- Utilize a preheated pizza steel or stone and avoid parchment paper to maximize heat transfer.
- Optimize your toppings to prevent excess moisture from making the crust soggy.
The Overlooked Power of Initial High Heat (It’s More Than Just ‘Hot Oven’)
Most recipes tell you to preheat your oven to a high temperature, typically 450-500°F (232-260°C). While that’s a good start, it’s only half the battle. The true secret to a crispy crust lies in the intensity and directness of the initial heat contact. Think about a commercial pizza oven – it often cooks a pizza in mere minutes because it surrounds the pie with extreme, consistent heat, especially from the bottom.
In my experience, simply setting your oven to 500°F isn’t enough if the surface the dough rests on isn’t equally scorching hot. The base of your pizza needs to undergo rapid desiccation (drying out) and caramelization the moment it hits the heat. If it doesn’t, the moisture in the dough turns to steam, which creates a softer, chewier crust. The error here is thinking high air temperature equals high surface temperature. It doesn’t. An oven’s air temperature can reach 500°F, but a cold baking sheet placed in it will absorb heat slowly, resulting in a gradual bake for the crust, which is the enemy of crispness. What changed everything for me was consistently preheating my pizza stone or steel for a minimum of 45-60 minutes, even after the oven reaches its set temperature. This ensures the thermal mass is saturated with heat, ready to shock the dough into crisp submission. I aim for that stone/steel surface to be as close to 500°F as possible, which often means pushing my oven to its maximum temperature setting for a full hour.
The Hidden Role of Dough Hydration (Less Isn’t Always More, But It Matters Here)
Many home bakers equate a high-hydration dough with a better crumb or a chewier texture, and for bread, that’s often true. However, for a truly crispy pizza crust, excessive hydration can be your undoing. More water in the dough means more water that needs to evaporate, and if it can’t escape quickly enough (due to insufficient heat, for example), it steams the crust from the inside out, preventing crispness.
What actually works is aiming for a dough hydration level between 60-65%. This provides enough workability without introducing a moisture overload that fights against crisping. In my early pizza-making days, I’d often experiment with 70%+ hydration thinking it would make a lighter crust. It made a chewier crust, sure, but never a crispy one. The key is balance. You want enough water for good gluten development and extensibility, but not so much that you’re battling a steam oven on the underside of your pizza. Pay attention to your flour and humidity – sometimes a slight adjustment (a tablespoon less water) can make all the difference. When your dough feels tacky but manageable, rather than overly wet and sticky, you’re on the right track for crispness.
The Critical Difference: Pizza Stone/Steel vs. Baking Sheet (And Why Parchment is a Foe)
This is perhaps the most impactful change you can make to your home pizza game. I spent years using a simple baking sheet, sometimes even lined with parchment paper, and consistently wondered why my crusts were pale and soft. The answer, simple yet profound, is direct, high heat transfer from a thermal mass.
What actually works is a preheated pizza stone or, even better, a pizza steel. A pizza steel is superior because steel conducts heat much more efficiently than ceramic (stone) and has a higher thermal mass, meaning it retains more heat. When your dough hits that superheated surface, it instantly begins to crisp and develop flavor (the Maillard reaction). Parchment paper, on the other hand, acts as an insulator, blocking that crucial direct heat transfer. In my experience, using parchment paper is a guaranteed path to a soggy bottom. Launch your pizza directly onto the preheated stone or steel. It takes a bit of practice to slide a pizza off a peel and onto the hot surface, but the results are unequivocally worth the learning curve. If you’re struggling, a little semolina flour or cornmeal on the peel can help prevent sticking, but never parchment.
Topping Management: Don’t Drown Your Crust in Moisture
Even with the perfect dough and optimal heat, your toppings can sabotage your quest for crispness if not managed correctly. Excess moisture from sauces, vegetables, and certain cheeses can release steam directly onto the crust, preventing it from drying out and crisping.
What actually works is a thoughtful approach to topping application. For instance, if you’re using fresh mozzarella, consider tearing it into smaller pieces and allowing it to drain for 15-20 minutes before placing it on the pizza. For high-moisture vegetables like mushrooms or spinach, a quick sauté or roast beforehand can remove significant water content. Even your sauce can be a culprit; a thin, flavorful layer is always better than a thick, watery one. In my early days, I’d load up my pizzas like a culinary maximalist, and my crusts suffered for it. I learned that less is often more when it comes to maintaining crispness. Distribute your toppings evenly and don’t create dense, wet zones. If you love a lot of veggies, consider adding some halfway through the bake or layering them strategically to minimize direct contact with the crust. This nuance in topping management is what separates a good homemade pizza from a truly exceptional one.
Frequently Asked Questions
Q: Can I achieve a crispy crust without a pizza stone or steel?
A: It’s significantly harder, but not impossible. You can try preheating a heavy-duty cast iron pan or an inverted baking sheet for at least 30 minutes at your oven’s highest temperature. The key is making sure the cooking surface is as hot as possible before the dough touches it. However, a pizza stone or steel will consistently yield better results.
Q: My dough is too sticky to launch onto the hot stone. What should I do?
A: Ensure your dough hydration is appropriate (60-65%). Use plenty of semolina flour or cornmeal on your pizza peel (the paddle you use to slide the pizza). Work quickly, stretching the dough on the peel and adding toppings right before launching. Give the peel a slight shake to ensure the pizza isn’t sticking before you slide it into the oven. A brief, firm push and pull motion can help slide it off.
Q: My crust is crispy but still pale. How can I get that golden-brown color?
A: The browning comes from the Maillard reaction, which requires high heat. Ensure your oven is at its maximum temperature (500-550°F or 260-290°C) and your pizza stone/steel is thoroughly preheated for at least 45-60 minutes. Sometimes, using a higher sugar content in the dough (just a pinch) can also aid browning, or a quick blast under the broiler for the last minute, if you’re careful.
Q: Should I oil my pizza stone or steel?
A: No, you should never oil a pizza stone as it will smoke and could damage the stone. For a pizza steel, it’s generally not necessary for pizza, though some manufacturers recommend light seasoning for other uses. For pizza, a dry, well-preheated steel is best.
Q: Can I use fresh tomatoes or watery vegetables for toppings?
A: You absolutely can, but with caution. For fresh tomatoes, slice them thinly and consider dabbing them with a paper towel to remove excess moisture. For other watery vegetables like mushrooms, onions, or spinach, sautéing them briefly before adding them to the pizza will cook out much of their water content, preventing a soggy crust.
Conclusion
Achieving that perfect, crispy homemade pizza crust isn’t some mystical art reserved for professional pizzaiolos. It’s a science, built on understanding and manipulating heat, moisture, and dough. By focusing on initial high, direct heat, managing your dough’s hydration, ditching the parchment for a preheated steel or stone, and being mindful of your toppings’ moisture content, you can transform your pizza game. I know because I made these shifts myself, and the difference was night and day. Stop settling for soggy; start crafting pizzas with a truly satisfying crunch that will impress everyone, including yourself. Your next pizza night is about to get a serious upgrade.
Written by Sophia Rodriguez
Budgeting & Everyday Living
An experienced lifestyle blogger, Sophia brings creative solutions for budgeting, cooking, and simplified living.
You Might Also Like

Why Your Home Still Feels Unclean (Even After Cleaning) — And The Hidden Culprits Nobody Talks About
Discover the hidden reasons your home still feels dirty after cleaning, and learn effective strategies for lasting freshness.

Why Your Homemade Yogurt Lacks That Perfect Tartness (And The Pro Secrets for Truly Tangy Flavor)
Discover why your homemade yogurt falls flat on flavor and learn the pro secrets to achieve that delightful tart and tangy taste you crave.
Why Your Homemade Cookies Are Flat (And The Simple Fixes That Guarantee Perfect, Puffy Results Every Time)
Stop making flat, crispy cookies. Discover the simple fixes to guarantee perfectly puffy, chewy homemade cookies every time, from ingredient temp to chilling.